Discover how to create and customize checklist templates in Jira to streamline repetitive tasks and enhance team efficiency.
By Alex Brayko
10 Oct 2024
In today's fast-paced business environment, efficiency is key. Repetitive tasks can consume valuable time and resources. That's where our checklist app's template feature comes in, allowing users to create custom checklists tailored to their specific needs. With templates, you can ensure consistency and save time, no matter your business domain.
Templates can be adapted to fit the unique requirements of various business domains. Here are a few examples:
Project Management:
Marketing:
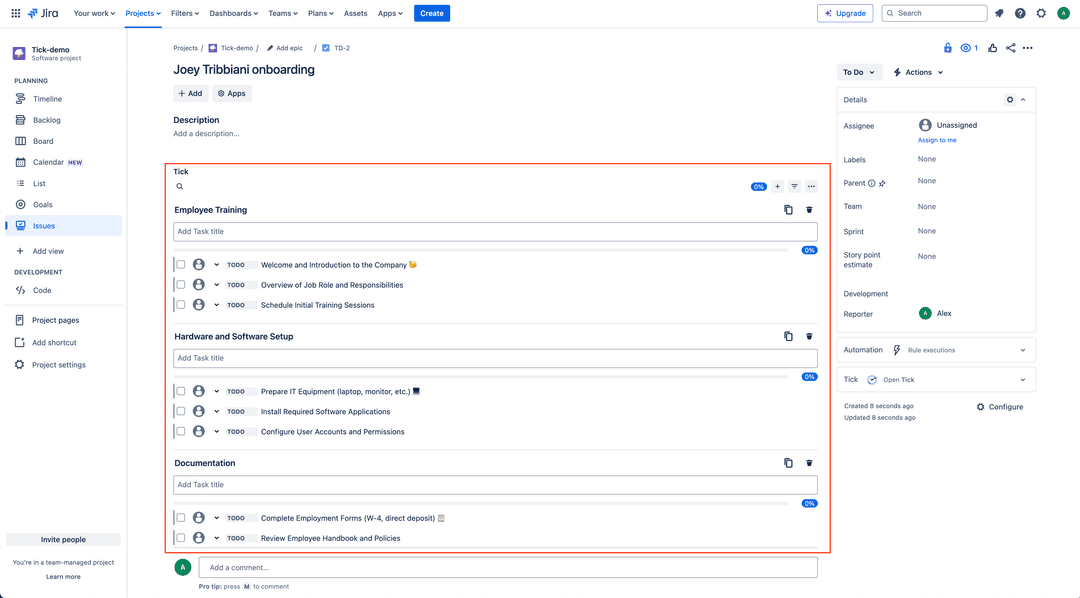
HR Onboarding:
Software Development:
Sales:
Finance:
Customer Support:
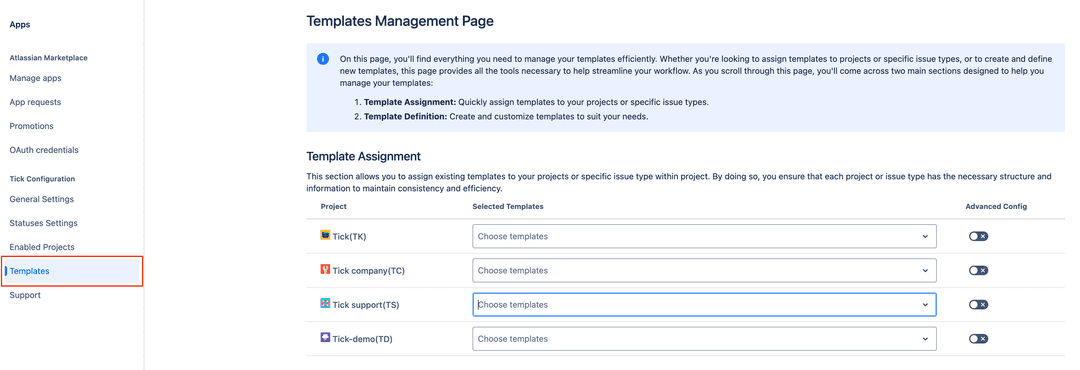
Ensure Admin Access: To get started, make sure you are logged in as a Jira admin.
Navigate to the Tick Admin Template Menu: Go to the Tick admin section and select the Templates menu.
Create a New Template:
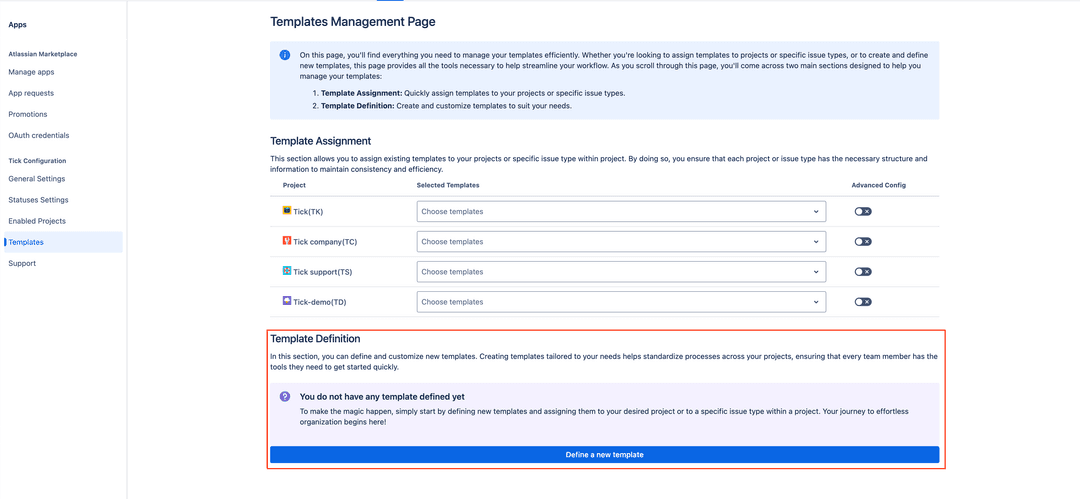
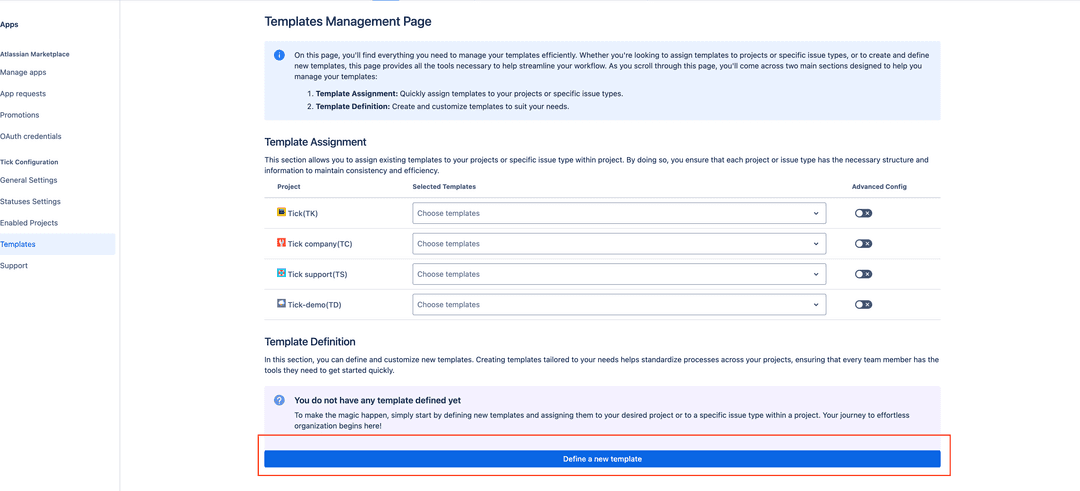
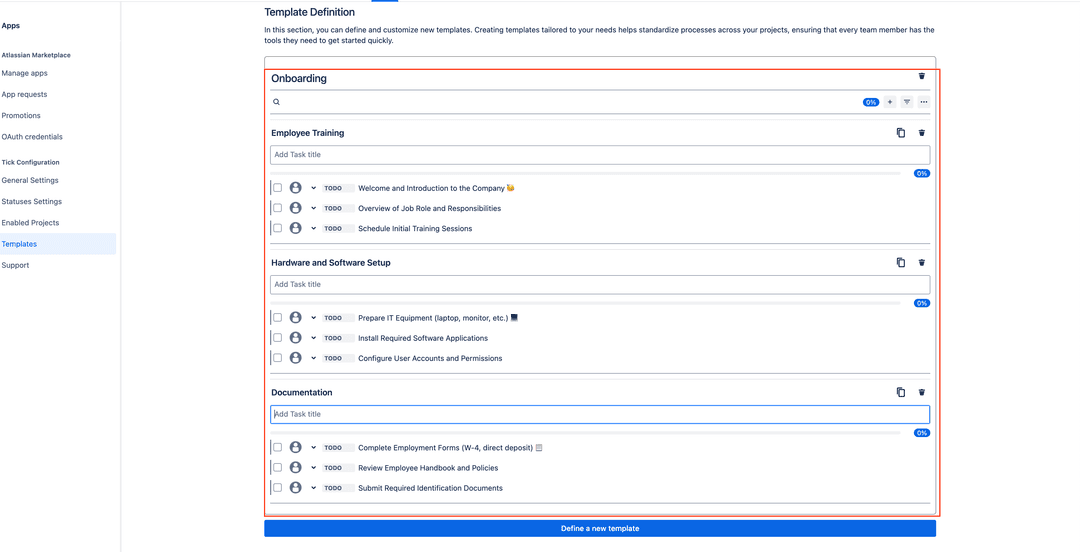
Customize your template just like you design your checklist, ensuring a consistent experience.
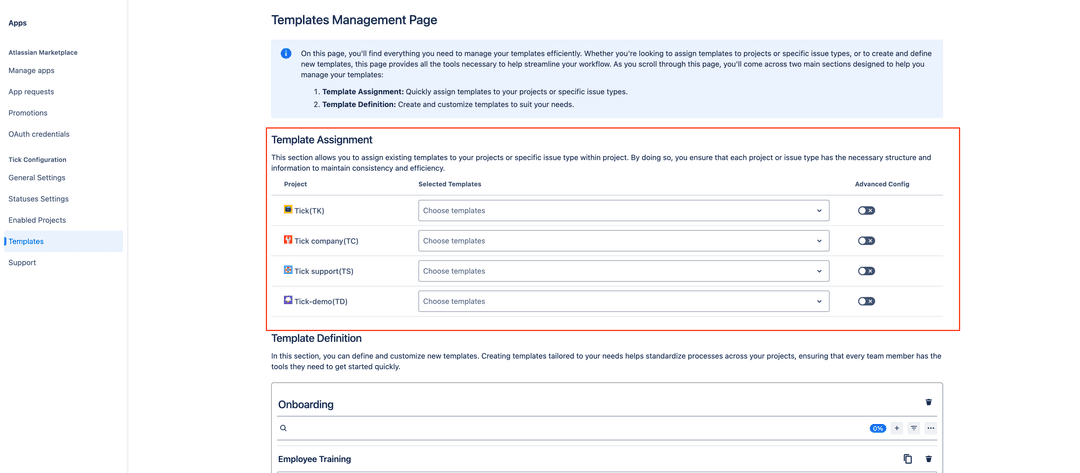
Access Template Assignment: Still within the Templates page, navigate to the Template Assignment section.
Select Your Project:
Find your desired project from the list.
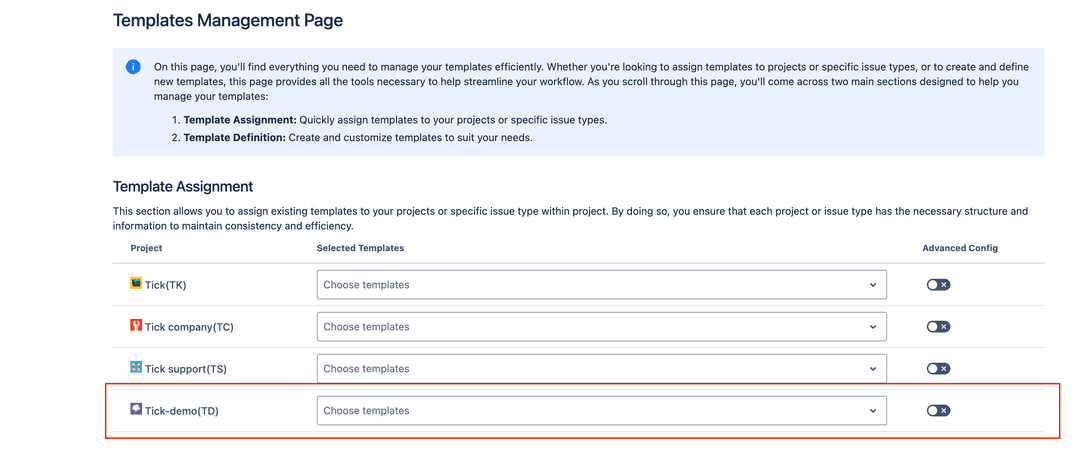
Use the dropdown menu to select the template you want to assign. You can assign more than one template if needed.
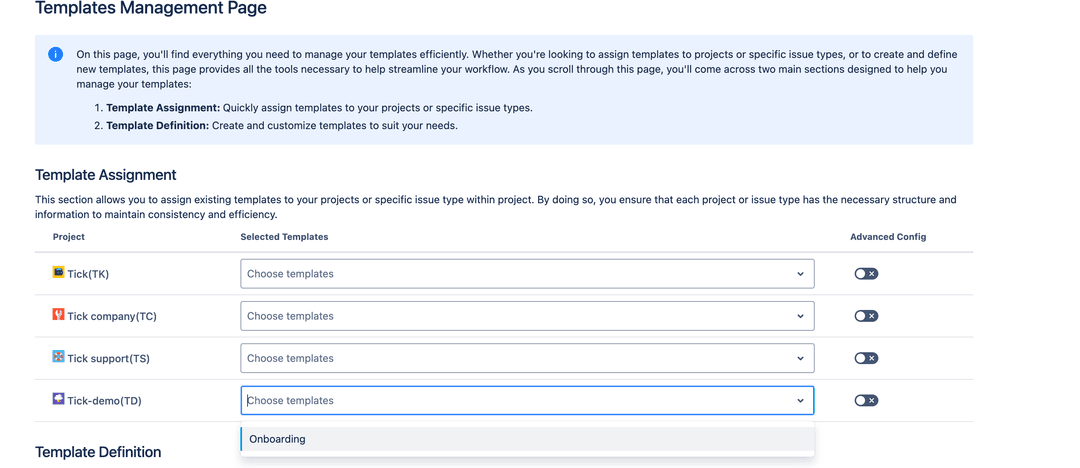
Advanced Configuration (if needed): If you want to assign the template to a specific issue type rather than the entire project, toggle the Advanced Configuration option.

All new tickets created with your selected criteria (either for the whole project or specific issue types) will now have the checklist available upon creation.
